

Team Accounts
Team account is a type of account that provides the means for collaboration. In a nutshell, it’s an account that can be simultaneously accessed by several teammates to perform their specific tasks.
A team account is a separate account with its individual account balance, service plan, and dedicated endpoints using a JWT token different from that of the personal account. In other words, an account owner can use both their personal and team accounts.
As a personal account owner, you have the means to establish and manage multiple teams focused on particular tasks. As a team account participant, you can perform tasks according to the access rights provided to you.
Personal account owner:
- Creates a team-specific account.
- Adds required teammates to it.
- Provides teammates with role-base access rights.
Team account participant:
- Switches between multiple team accounts to exercise the roles according to the access rights granted.
Personal Account Owner
Premium users can establish up to 5 team accounts to structure and manage their business. That procedure consists of two parts:
Create Team Account
To create a team account, follow these steps:
-
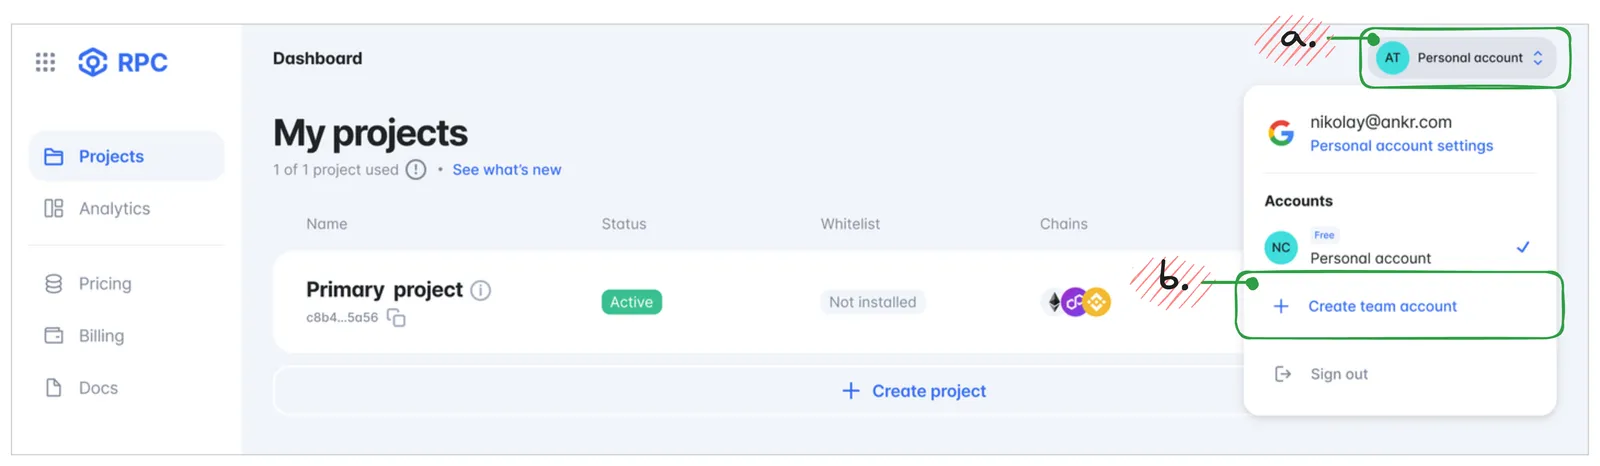
Click the Accounts menu > + Create team account to start the procedure.
-
In the Create team account dialog, specify the following parameters:
- Name — enter a team account’s name.

- Enable assets transfer (personal —> team) — here you have 2 options available for account creation:

- Toggle On — to create a team account based on your personal account’s structure. This means that all the assets (JWT token, Premium service plan, account balance, projects, and analytics) will be cut from your personal account’s structure and pasted as the structure for the team account you create.
- Toggle Off — to create a team account from scratch. This means that your personal account stays the same, and you start creating the whole structure for the team account from ground zero.
- Name — enter a team account’s name.
-
Click Confirm and create if you’ve toggled On the Enable assets transfer option, or just Create if you’ve toggled it Off.
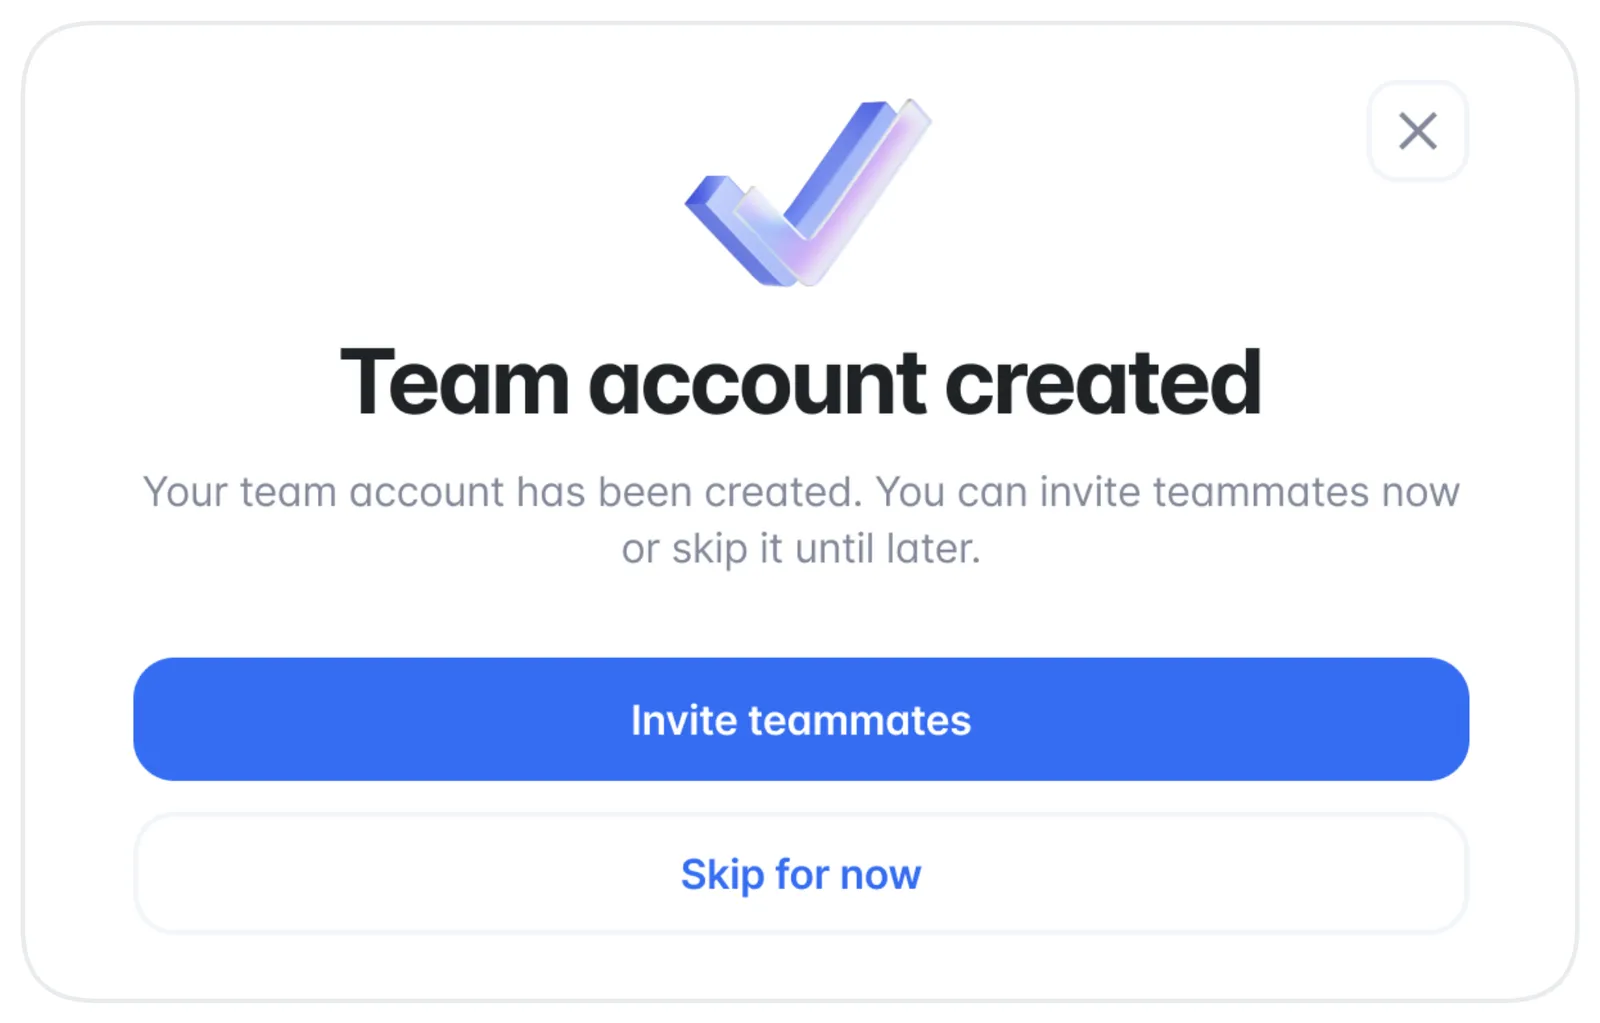
Congrats — you’ve just created a team account. The next step is to invite teammates to the account created.
Invite Teammates
To invite teammates (max.: 20) to a team account, follow these steps:
- Sign in to the Web3 API platform.
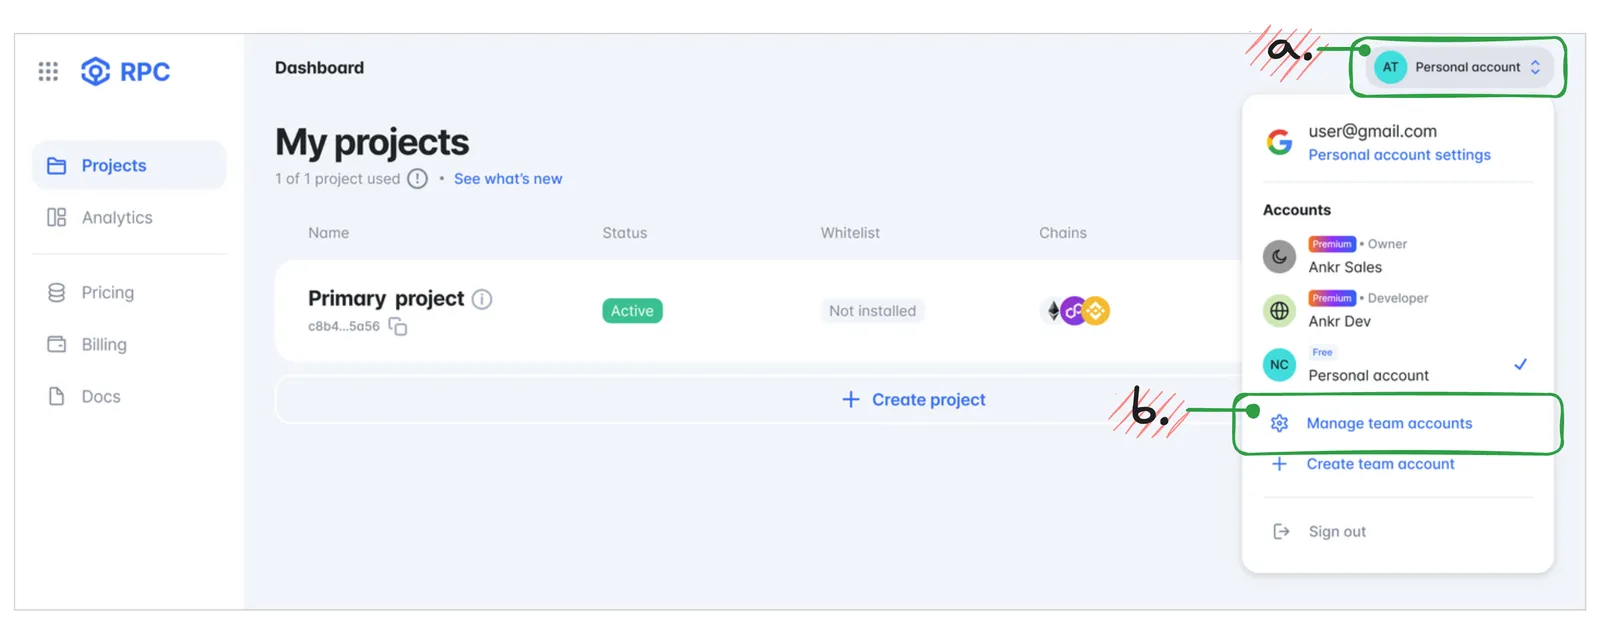
- Click the Accounts menu > Manage team accounts to open the Team accounts pane.
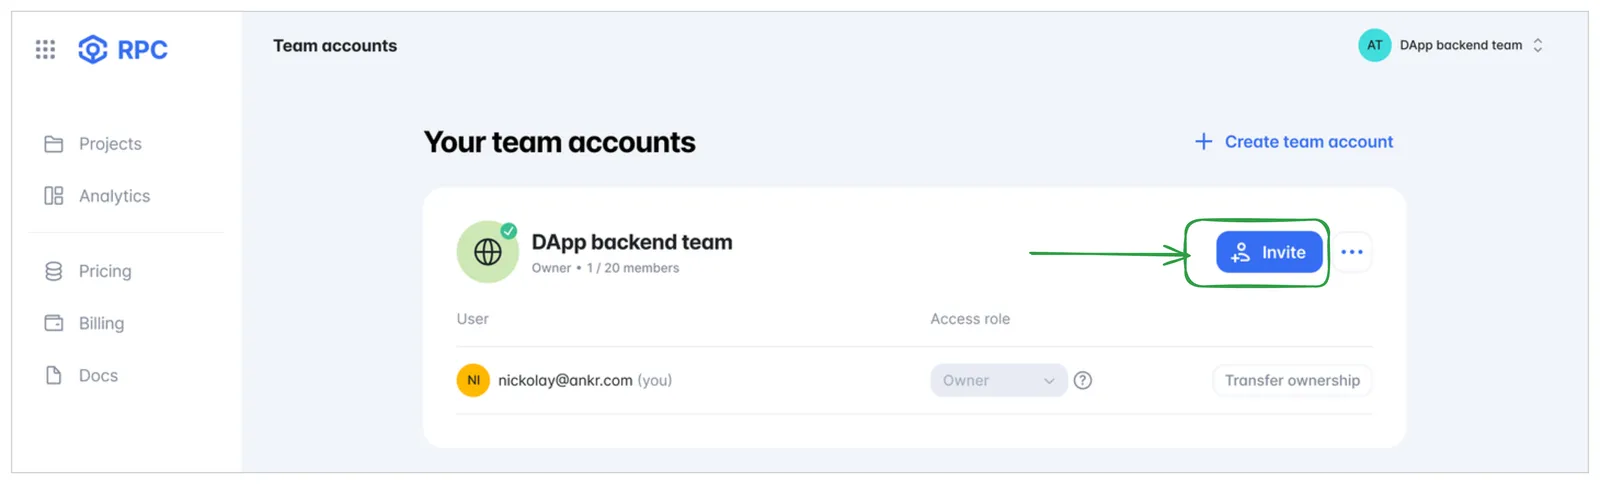
- In the Team accounts pane, click Invite to open the Invite teammates dialog.
- In Invite teammates dialog, add your teammates’ gmails, assign the applicable access roles for them, and then click Invite:
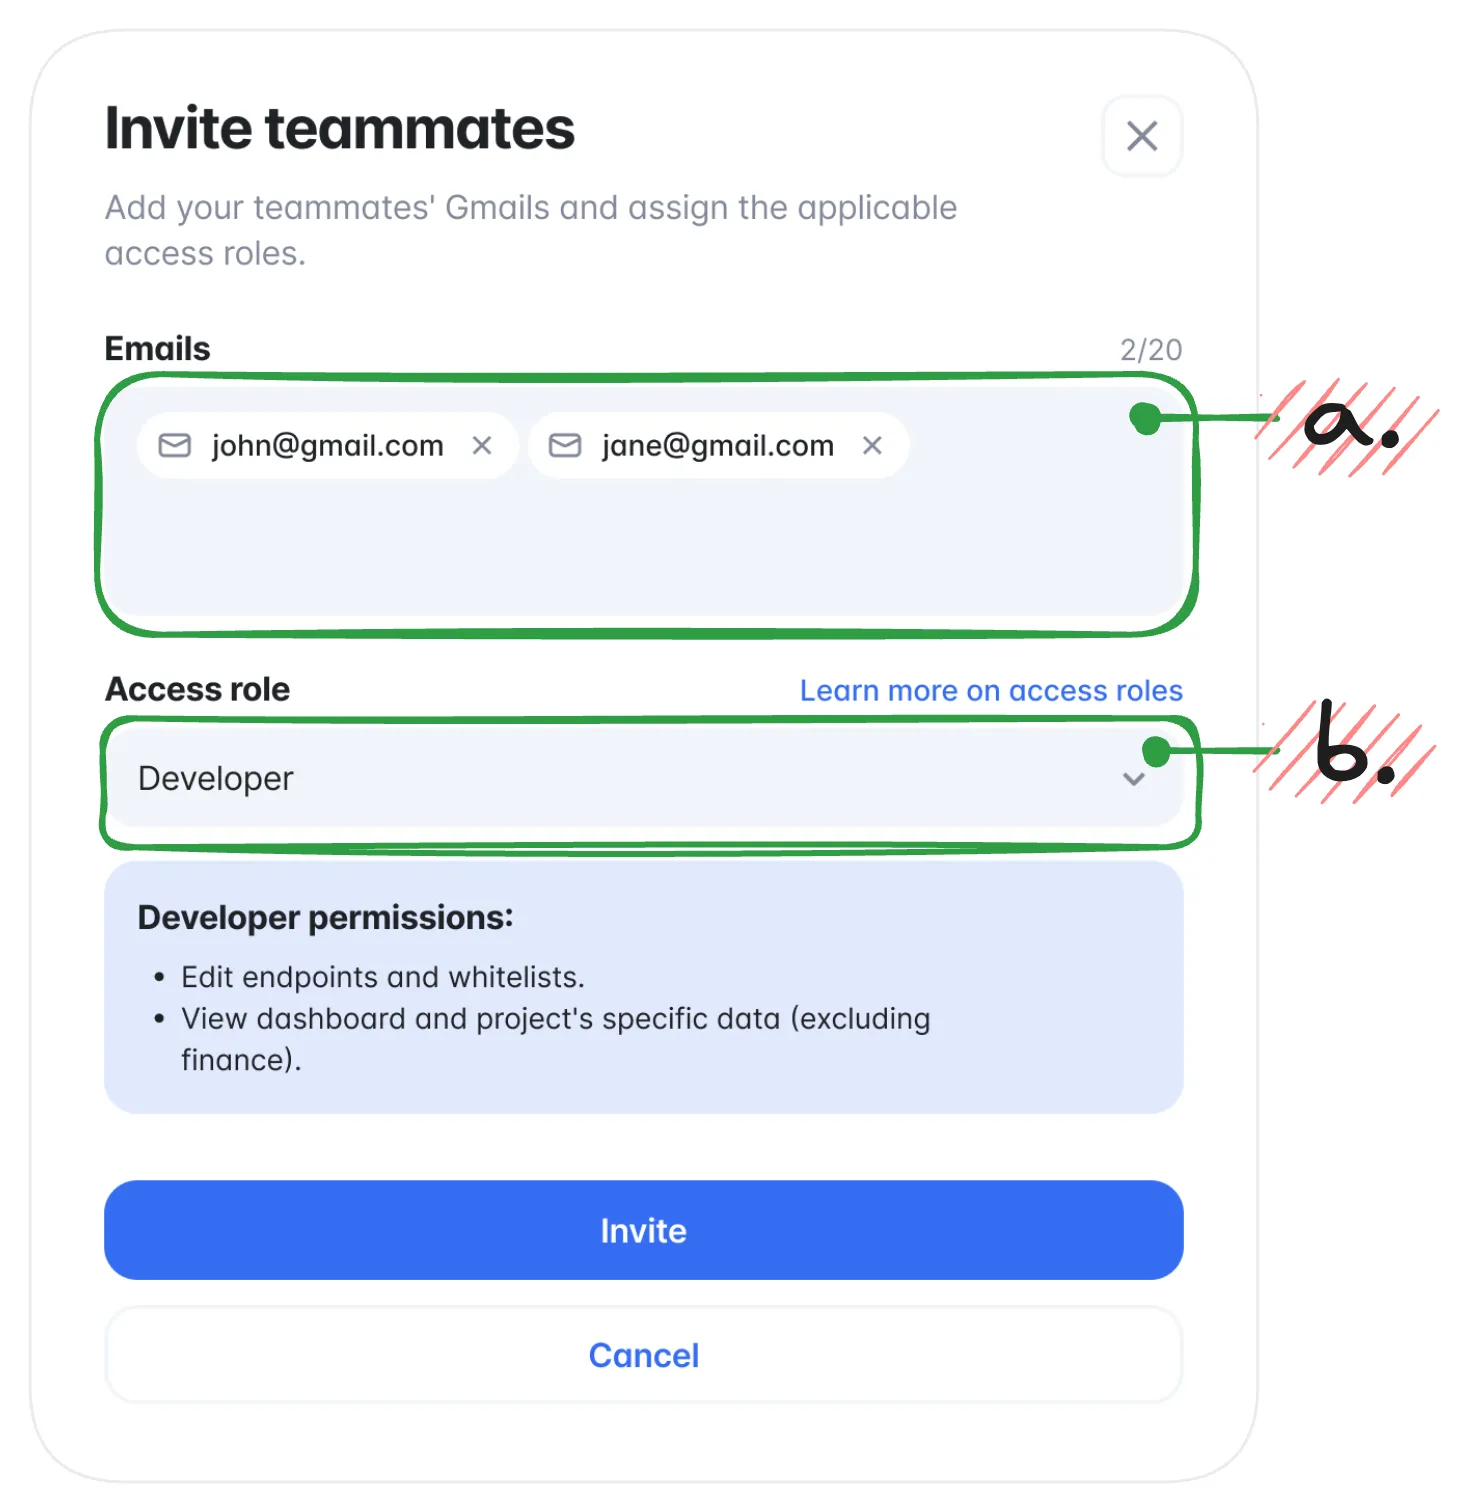
- Admin — manages the account’s service plan, adds/deletes teammates, edits teammates’ access roles, and manages projects.
- Developer — adds/edits endpoints and whitelists, views projects’ statistics.
- Finance — manages the account’s service plan, deposits funds into account balance, views financial data (payments history, expense chart).
Congrats — you’ve just added teammates to a team account. The selected teammates will receive email invitations that they need to accept to join the team.
Edit Access Roles
To edit teammates’ access roles, do the following:
- Sign in to the Web3 API platform.
- Click the Accounts menu > Manage team accounts to open the Team accounts pane.
- In the Team accounts pane, click the required account to expand its contents.
- For the required user, click the Access role drop-down menu, select an applicable access role, and then click Update role:
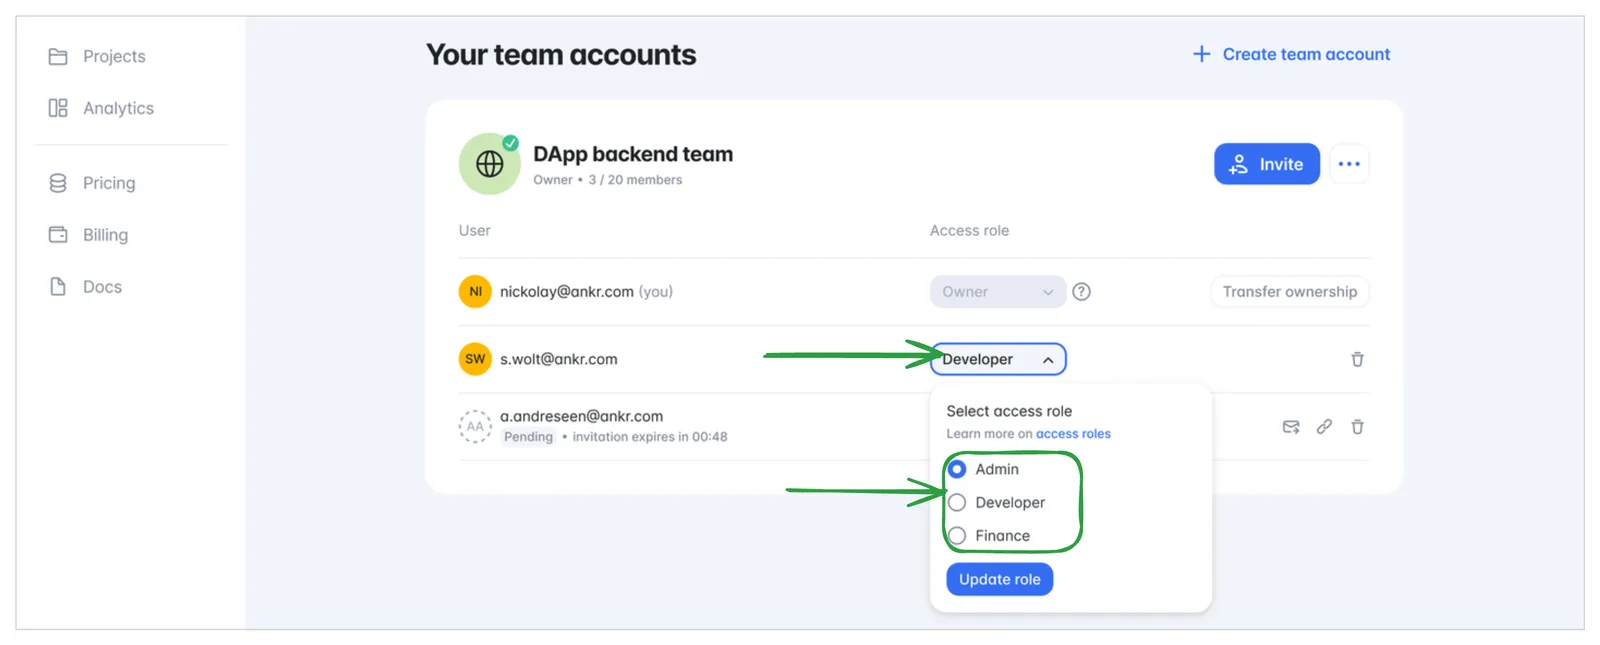
- Admin — manages the account’s service plan, adds/deletes teammates, edits teammates’ access roles, and manages projects.
- Developer — adds/edits endpoints and whitelists, views projects’ statistics.
- Finance — manages the account’s service plan, deposits funds into account balance, views financial data (payments history, expense chart).
Congrats — you’ve just edited your teammate’s access role. The teammate will receive the email invitation that they need to accept to join the team in the new role.
Switch Accounts
To switch your current account, do the following:
- Sign in to the Web3 API platform.
- Click the Accounts menu and select the account you’d like to switch to.
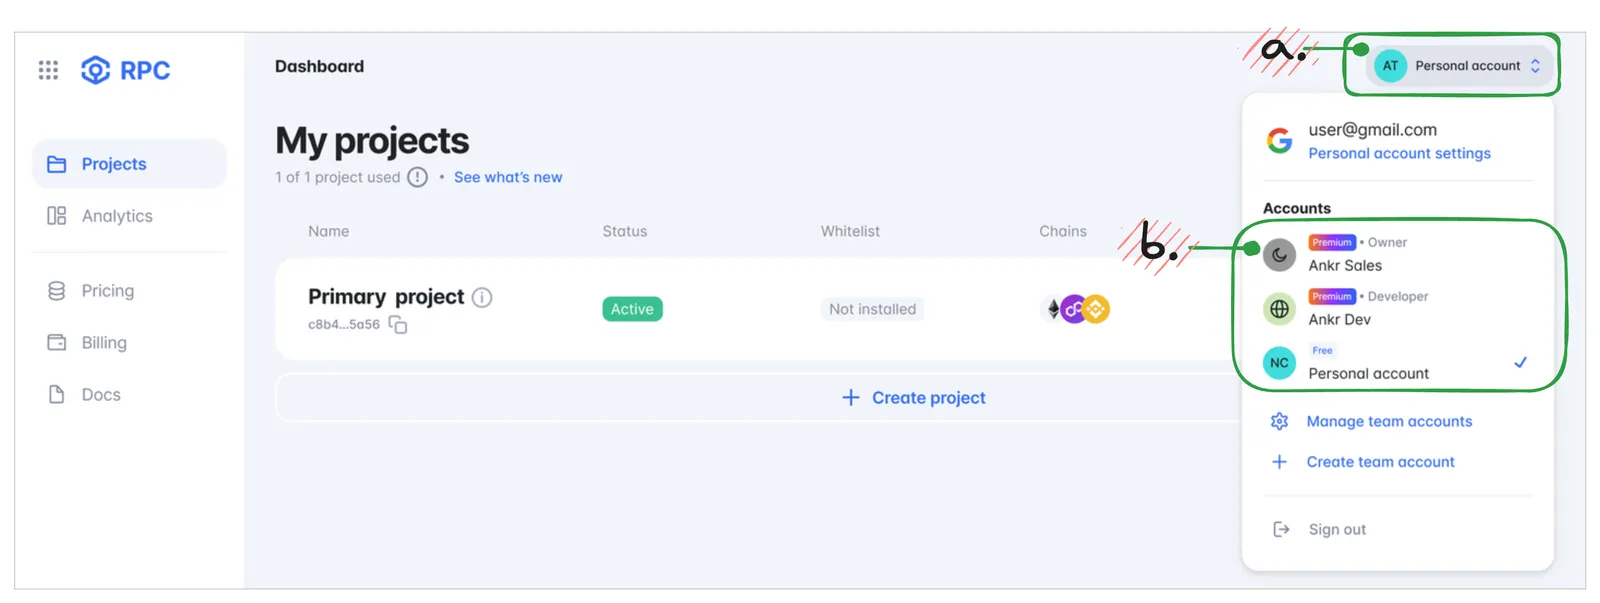
Congrats — you’ve selected an account to work with.
Team Account Participant
Accept Invitation
- In your Google mailbox, find the team account invitation and open it.
- In the Team account invitation email, click View invitation to get to our Platform.
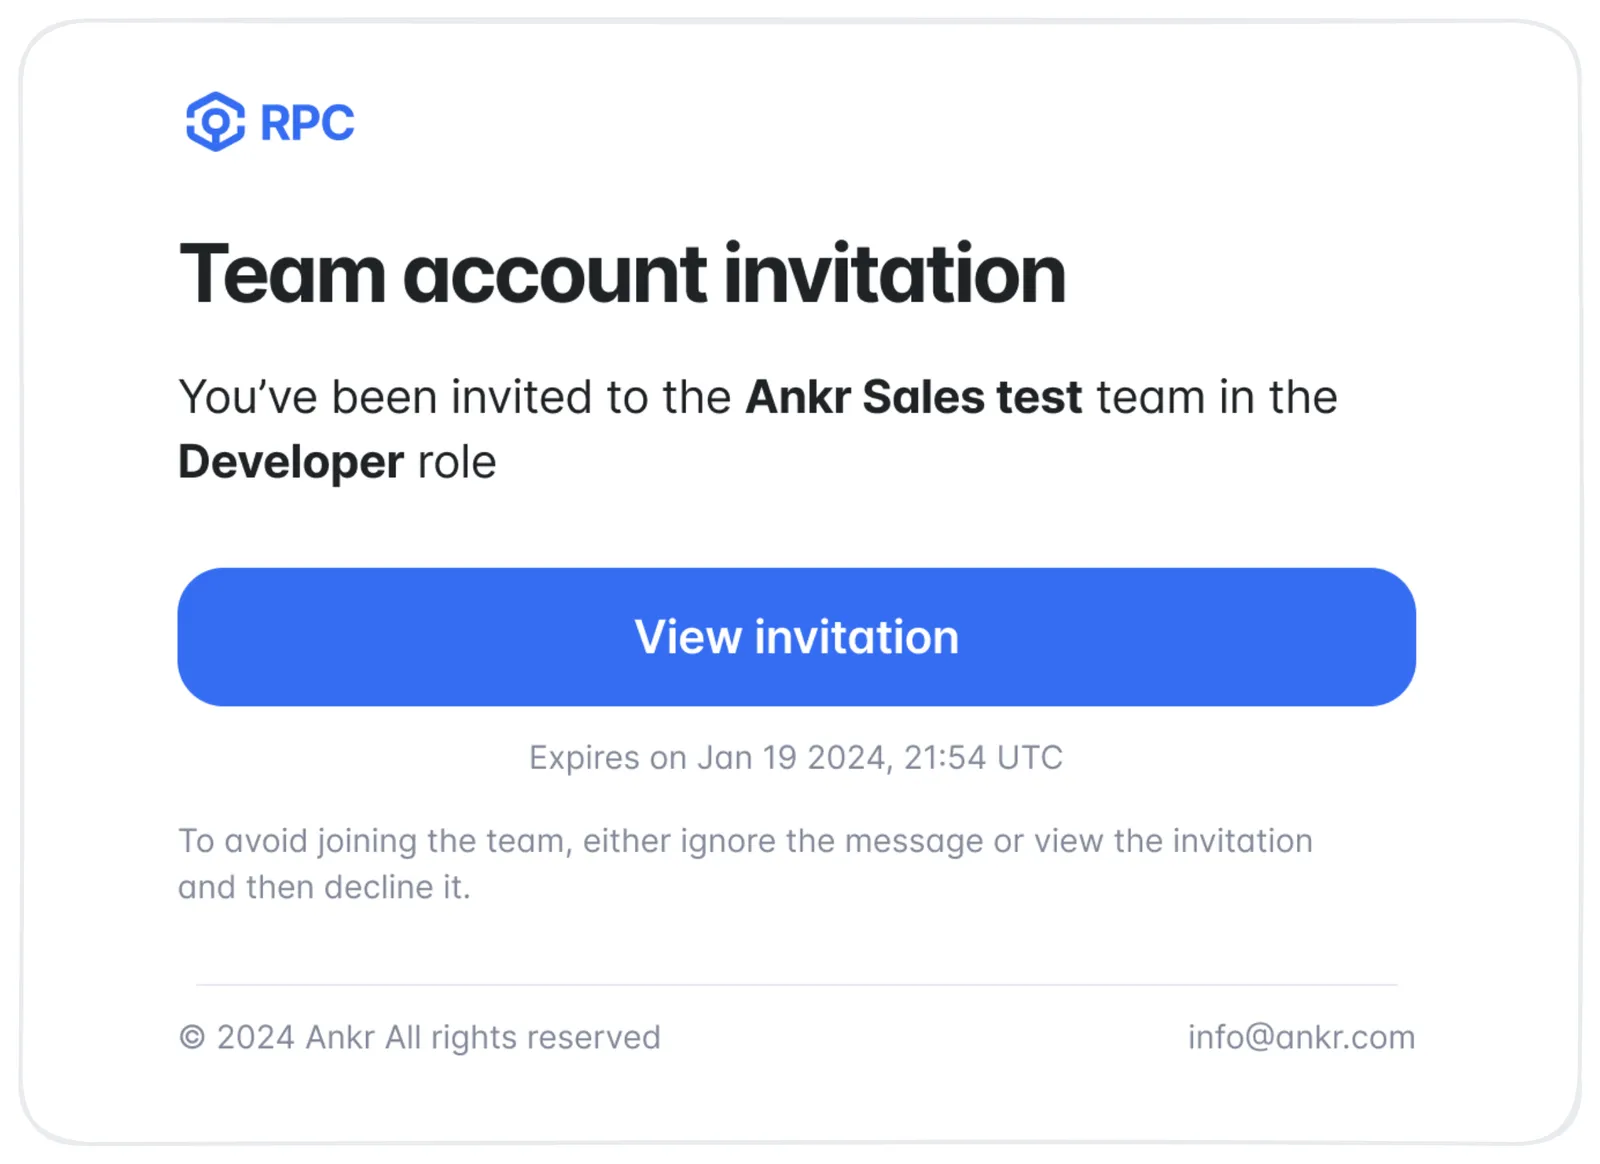
- In the Welcome to the team dialog, click Join team to accept the invitation.

Congrats — you’ve just joined the team and can collaborate according to your access rights.
Switch Accounts
To switch between the team accounts you belong to and exercise the corresponding access rights granted, do the following:
- Sign in to the Web3 API platform.
- Click the Accounts menu and select the account you’d like to switch to.
Congrats — now you can start performing the tasks according to your access rights.